If the image is captured at the wrong angle or the scanned image is reversed in the wrong direction. In this case, you can rotate images and layers in Photoshop. Fortunately, Photoshop has many tools to do it. There are many ways to rotate an image in a photoshop. Learn how to rotate layers and objects in Adobe Photoshop. Select a layer, adjust the degree, and move photos and shapes correctly. Master in selection and rotation techniques with this guide of image rotation. Do you know how to rotate an image in Photoshop? This guide is perfect for beginners and those who want to improve their Photoshop skills. Cover everything from the basics of layers and the importance of design to a step-by-step guide to effectively rotating layers. Let’s start!
What Is Image Rotation?
Image rotation is one of the facilities offered by most of these applications software with which you can alter the orientation of an image around its center axis. It’s mainly applied in fixing an angle that was captured by mistake, such as an oblique photo. It often proves useful during the design process to add depth to visual layouts or simply introduce novelty into some creative project. Image rotation in Photoshop has several pre-defined options: 90-degree clockwise, 90-degree counterclockwise and 180-degree flips. However, if higher angles of precision are needed for adjustment, you can even rotate images into customized angles. Photoshop rotates images non-destructive, so it does not degrade the quality. If an image is rotated a number of times at different angles, then distortion in its pixel grid may occur. That occurs only for raster images because the raster ones degrade the pixel quality over time.
Steps on how to rotate an image in photoshop
Let’s break it down further with step-by-step on how to rotate an image in Photoshop so you can make sure it has the perfect orientation for any project you might have.
Step 1: Open Your Image
First, open your picture inside Photoshop.

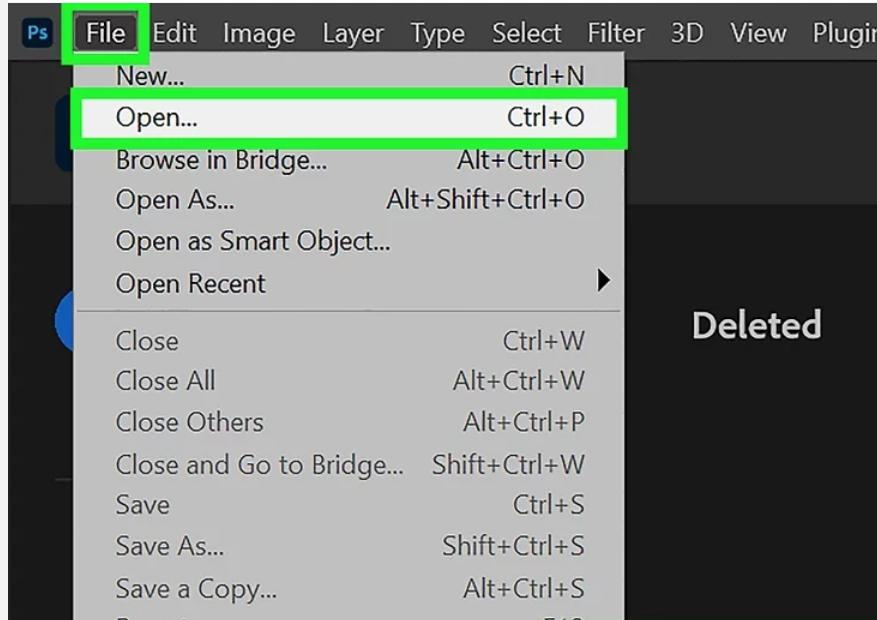
- Open Adobe Photoshop from your computer.
- Click on File on the upper left part of your screen.
- Click Open then browse through the folder where you have saved your image .
- Click the image you would like to open and press Open .
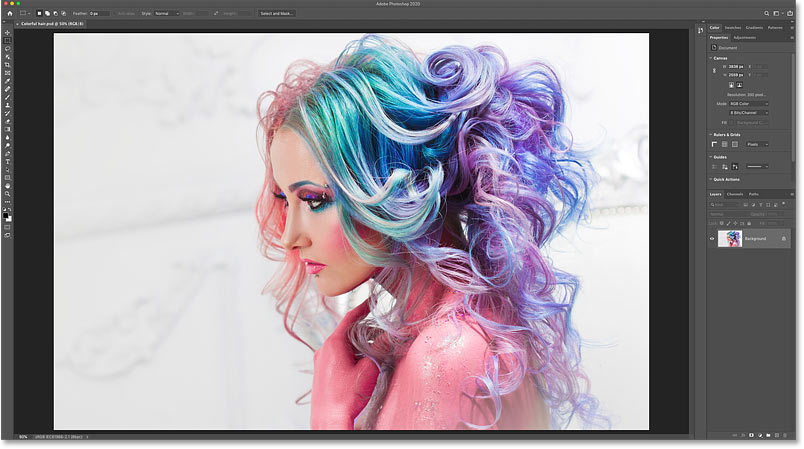
Now the image will automatically be loaded into the major Adobe Photoshop workspace, ready for rotation
Step 2: Access the Rotate Tool
Photoshop makes it an affair that is pretty easy to do by offering its built-in feature of Image Rotation.

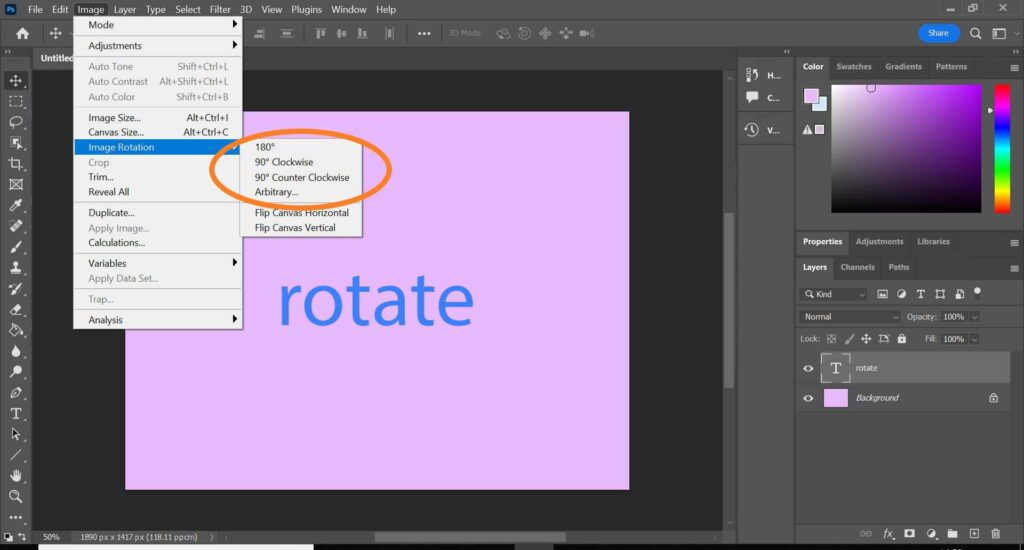
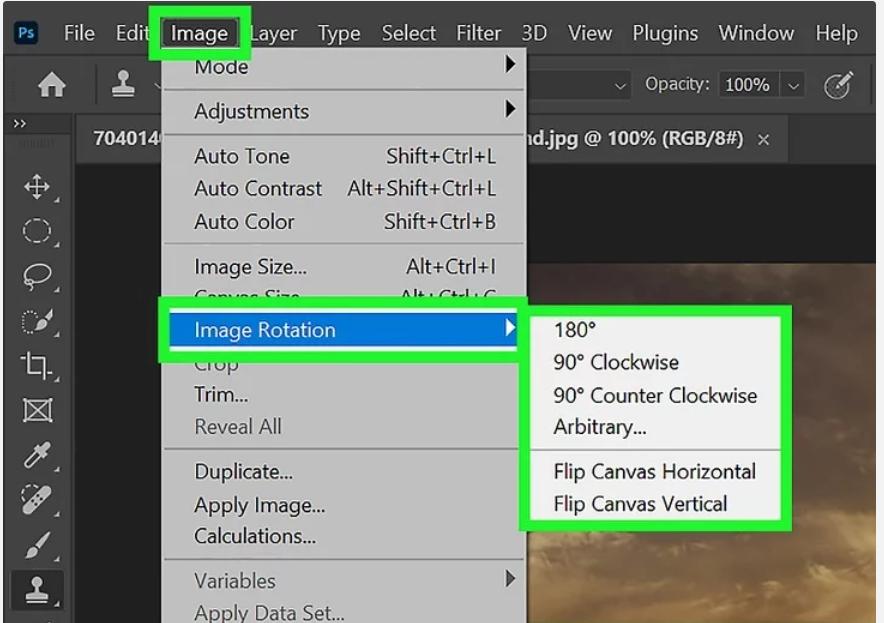
- Select Image from the top menu.
- Scroll down through the dropdown menu to Image Rotation.
This will reveal numerous options to rotate your image at preset angles:
- Rotate 90° clockwise sends it rotating to the right
- Rotate 90° counter-clockwise sends it rotating to the left
- Rotate 180° flip image upside down.
You can use Arbitrary to rotate an image by any custom angle you might want to.
Step 3: Rotate the Image by Custom Angle (Using Arbitrary Rotation)
Sometimes, you might need to rotate an image by a very specific angle, say 45 or 30 degrees, rather than just 90 or 180 degrees.
- In the Image Rotation drop-down, select Arbitrary.
- A small dialogue box will appear where you can enter the exact degree of rotation.
- Enter your angle as you like, such as 45 degrees.
- Select whether you want your image to rotate clockwise or counterclockwise.
- Click OK.
Your image will be rotated to an exact degree that you specify.
Step 4: Save Your Rotated Image
Once you are satisfied with the rotation of your image it’s time to save your work.

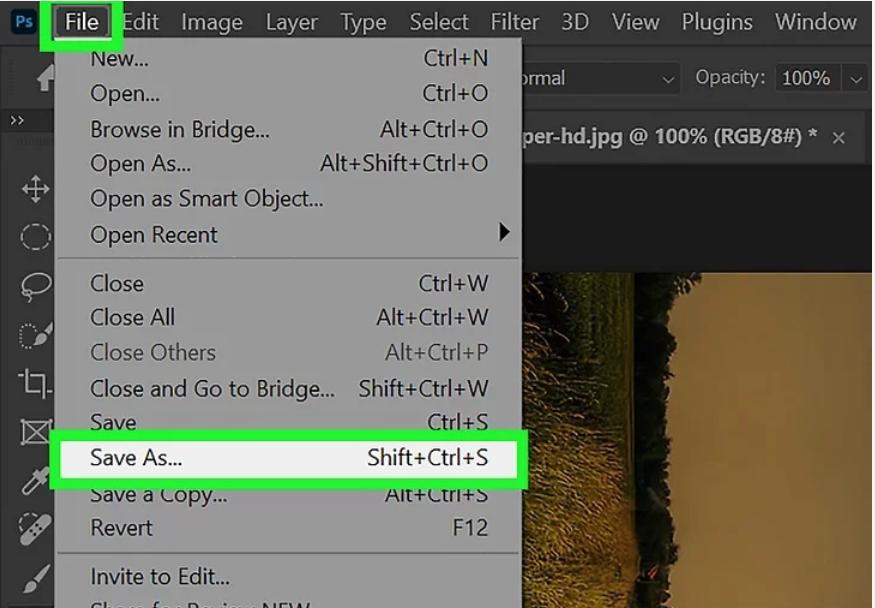
- Click File at the top left corner of the screen.
- Save As
- Select a file type, like JPEG, PNG, or TIFF, and give it the desired location to save on your computer.
- Click Save.
And there you have it! You’ve successfully rotated and saved your image in Photoshop.
How to Mirror an Image in Photoshop?
The mirroring of an image, also known as flipping, is done using the reversed direction of an image, horizontal or vertical. This enables one to attain symmetrical designs, add reflections, or just flip an image for aesthetic purposes. Photoshop has a straightforward procedure for mirroring any image.
Step 1: Open the Image
Just as you did earlier, open the image that you want to mirror:
- Open Photoshop and choose File > Open.
- Open the image you desire to flip and click Open.
Step 2: Access the Flip Tool
To flip your picture, this is a step by step process:
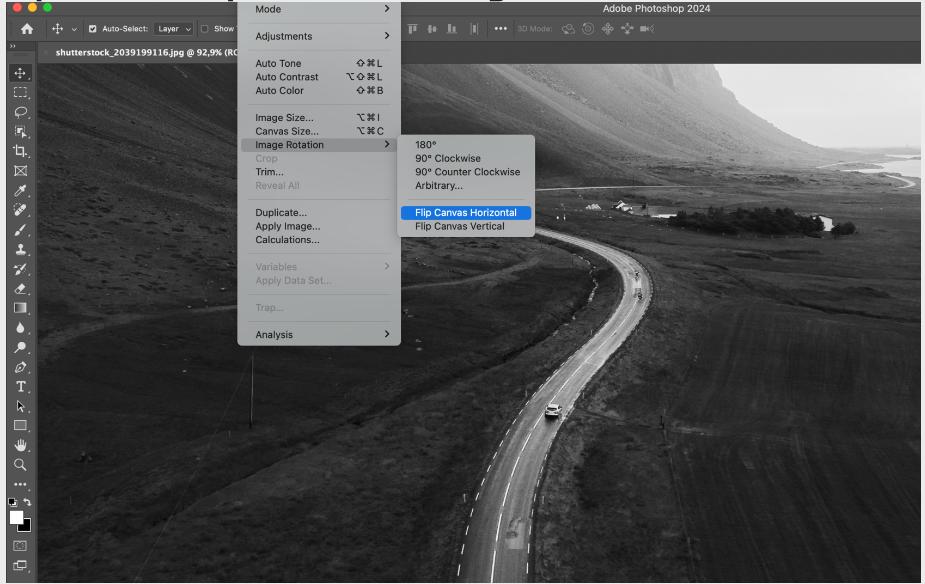
- Open your image in Photoshop by clicking it. On the top toolbar, look for the Image menu.
- Click down the menu which will unveil Image Rotation.
- Now click on Flip Canvas Horizontal or Flip Canvas Vertical.
Flip Canvas Horizontal: It will reflect an image over the vertical axis, like flipping an image over from left to right.
Flip Canvas Vertical: It will reflect an image in the horizontal axis so that the whole image is upside down.
Step 3: Save the Mirrored Image
After you’ve mirrored your image, never forget to save your work:

- File > Save As.
- Choose the format and location you like and click Save.
Congratulations! You’ve been able to mirror your image in Photoshop!
How to Rotate the Canvas in Photoshop?
Rotating your whole canvas instead of the image itself can be very useful when you’re working with complex compositions that need several layers or simply to flip the orientation of your whole workspace for easier editing. The good thing is, Photoshop allows users to rotate the canvas without affecting its individual elements.

Step 1: Open the Photoshop Project
You’re going to first need to open a project with lots of layers or images to rotate the canvas. If you have used just one image, that’s fine too; the process is exactly the same.
Step 2: Rotate the Canvas
To be able to rotate the entire canvas you do the following:
- Come up and click on Image at the top toolbar.
- Select Image Rotation.
- You are now free to choose either the pre-defined rotation options (90 degrees clockwise, 90 degrees counterclockwise, 180 degrees) or random; thus, you are free to put in an angle of your choice.
This will rotate the entire canvas and all the layers and objects in it.
Step 3: Save the Project
Rotation of an image is very similar to the motion of rotation. Once you have rotated the canvas, you need to save your project:
- File > Save As.
- Choose the orientation you want, then click Save.
You have now rotated the entire rectangle and saved your file
How to Rotate Images in Photoshop Using the Free Transform Tool?
Free Transform Tool is perhaps one of the most handy tools within Photoshop. It allows a completely free rotation and resizing of objects or layers.
Step 1: Open Your Image and Select the Layer

- Open the image in Photoshop: File > Open.
- Select the layer that your image falls under in the Layers panel
Step 2: accessing the Free Transform Tool
To access the Free Transform Tool, go to:
- Edit on the top toolbar.
- Free Transform, or Ctrl+T on Windows or Cmd+T on Mac
You should be seeing a bounding box around your image so you could edit the size and orientation of that image.
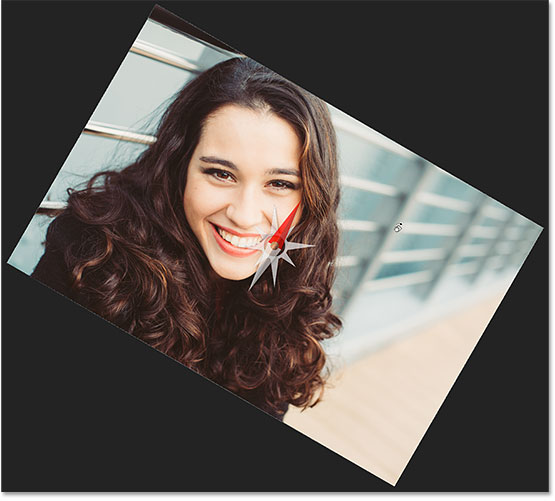
Step 3: Rotate the Image Using Free Transform
To rotate an image:

- Move your cursor to one of the corners of the bounding box until it turns into a curved, double-sided arrow.
- Click and drag on the corner. You can rotate the image any degree you wish.
To rotate the image in 15-degree increments-that’s excellent for accuracy-use the Shift key whilst dragging on the corner.
Step 4: Confirm the Rotation
Once you are happy with the amount of rotation, press Enter on Windows or Return on Mac to accept the transformation. The Free Transform Tool has rotated the image.
Step 5: Save the Rotated Image
As always, when you are happy that you’ve finished rotating, don’t forget to save your work:

- From File > Save As.
- Choose a format and location and click on the Save button.
How to Use Arvin AI for Image Rotation?
Arvin AI is a next-generation photo-editing tool based on AI, designed to make your Photoshop workflow easier and smoother. Photoshop boasts of one advantage over the powerful manual tools it offers; however, by making mundane processes easier – like rotating images, mirroring, and flipping – Arvin AI can make an entire chain of tasks automatic with AI integration, saving you your precious time and, perhaps, the risk of human mistakes. For instance, if you want to rotate different pictures at once or rotate an image and resize it simultaneously, Arvin images tools can do this with precision while still maintaining high-quality images.

Benefits of Using Arvin AI for Rotating Images
- Batch Processing: You can rotate multiple images at a go without having to adjust each image one after the other.
- Precision and Accuracy: The output from Arvin AI on rotation issues usually turns out to be consistent and accurate, eliminating all causes of human error.
- Quality Preservation: Arvin AI does not degrade the native resolution of the image while editing, unlike any other rotation tool.
Conclusion
Core competence in Photoshop relates to rotating images, with Free Transform Tool and Image Rotation options, and especially using advanced AI assistance like Arvin AI to make the simple act of rotation a creative powerhouse. Whether you aim to rotate a photo by 90 degrees just to correct it fast or you have some dynamic angles in mind for your design project, Photoshop has everything you need to get the job done right. Towards 2024, with the development of AI-based solutions, for example, Arvin AI can take the next steps in their workflow while making the tasks related to image manipulation fast and efficacious. Having read through this guide of how to rotate an image in Photoshop, you won’t face any problems in rotating, flipping, and mirroring images in Photoshop and therefore get the most out of this versatile tool.
FAQs
Yes, generally, image rotation in Photoshop does not degrade the quality of an image because what is essentially done is to reorient the content of an image. However, if you continuously rotate an image to and fro or perform multiple different transformations, the picture quality will lose its priority, especially in raster-based pictures, with Arvin AI and non-destructive methods in Photoshop, your image quality will be preserved in the process.
To rotate multiple images in Photoshop at once you can simply open up all the images as separate layers in one document. Then, using Shift+ Click on each of them you are selecting all the layers at one time. Now you can rotate using the Image Rotation or Free Transform tool. If you are handling a large number of images, you may find that using the batch processing tools, or even a new kind of AI model like Arvin AI is helpful in workflow.
If the image isn’t rotating as I expected, it is probably because locked layers and previous edits I made on the editing part. Open the Layers panel and select the layer you want to rotate and unlock the layer. Still, your picture won’t rotate? Then, you have to turn the layer into a Smart Object first, before rotating the effect.
Rotating an image will cause an image to be moved about its axis and will reverse the direction of orientation. For example, a rotation of 90° clockwise shifts the image one-quarter turn. Flipping an image has the mirror effect, where it will either invert it horizontally or vertically. Rotation will keep the structure intact while flipping reverses the image. Arvin AI can also help you master the difference between transforms of images, thus easily achieving some desired visual effect.