DPI, or dots per inch, is a crucial measurement in the world of digital imaging that directly affects the quality and clarity of printed images. Knowing how to determine the DPI of an image is essential. We provide the steps to find the DPI of an image both on Mac and Windows.
However, finding the right DPI for your images is just the beginning. With Arvin‘s advanced image tools at your fingertips, you can enhance, restore, and create stunning visuals effortlessly. Whether you need to upscale an image, clean it up, or design something completely new, Arvin has you covered. Start using Arvin now and elevate your creative projects to the next level!

What is DPI?
DPI stands for Dots Per Inch. This is a term, originally from printing, that refers to how many printed dots there are in one inch of your printed document. It’s now a term used across computing to allow you to determine the quality and resolution of a photo or image.
The higher the value, the more detailed and sharper your image will be. Images with higher DPI values can also be zoomed in much further before pixelation begins to occur.
DPI is important when you’re printing images. If you want to create a large print of an image, you need to be sure that it has a high DPI. Otherwise, the image will look poor when you print it at a larger size.
What’s DPI Used for?
DPI is used for printer resolution, to indicate the clarity and detail of an image on paper. It’s an important measurement for photographers and designers, as it will determine the quality of a printed asset – whether for a poster, a brochure or a glossy magazine.
- DPI is what makes an image look crisp and high-quality. The higher the number, the more ink droplets are tightly bunched together.
- This also goes for scanning. Like a printer, scanners also measure quality in DPI, meaning the number of points of data the scanner and computer picks up from the image.
- DPI can also vary depending on the printer. Your average inkjet or laser printer can produce images of at least 300 DPI, if not higher, whereas some professional printers may need to print images with a resolution of twice that number.
How to Find DPI of Image on Mac?
Using Preview (Mac)
- Open Finder and navigate to your image.
- Right-click or control-click the file and select Open With > Preview.
- With Preview open, go to Tools > Show Inspector.
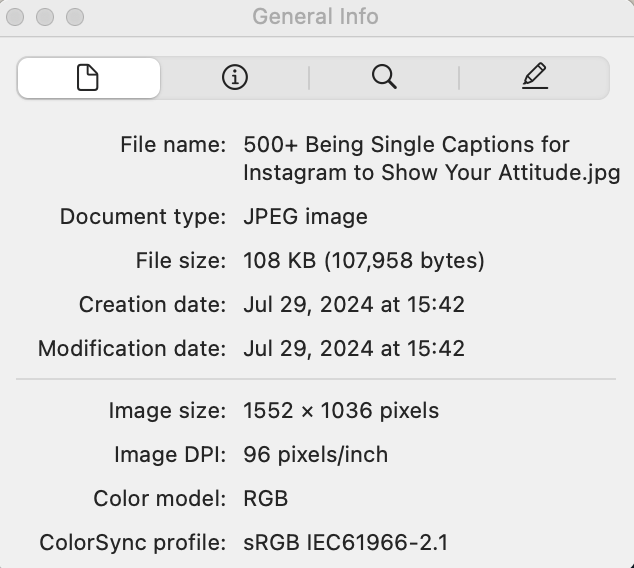
- Select General Info from the dialog box, this should be the first tab at the top.
- View the image information to find the resolution or click More Info in the second tab at the top to find the DPI.
How to Find DPI of Image on Windows?
Properties Menu (Windows)
- Navigate to the image. If the image is in your Pictures folder, use the File Explorer to navigate there now.
- Right-click the image and click Properties.
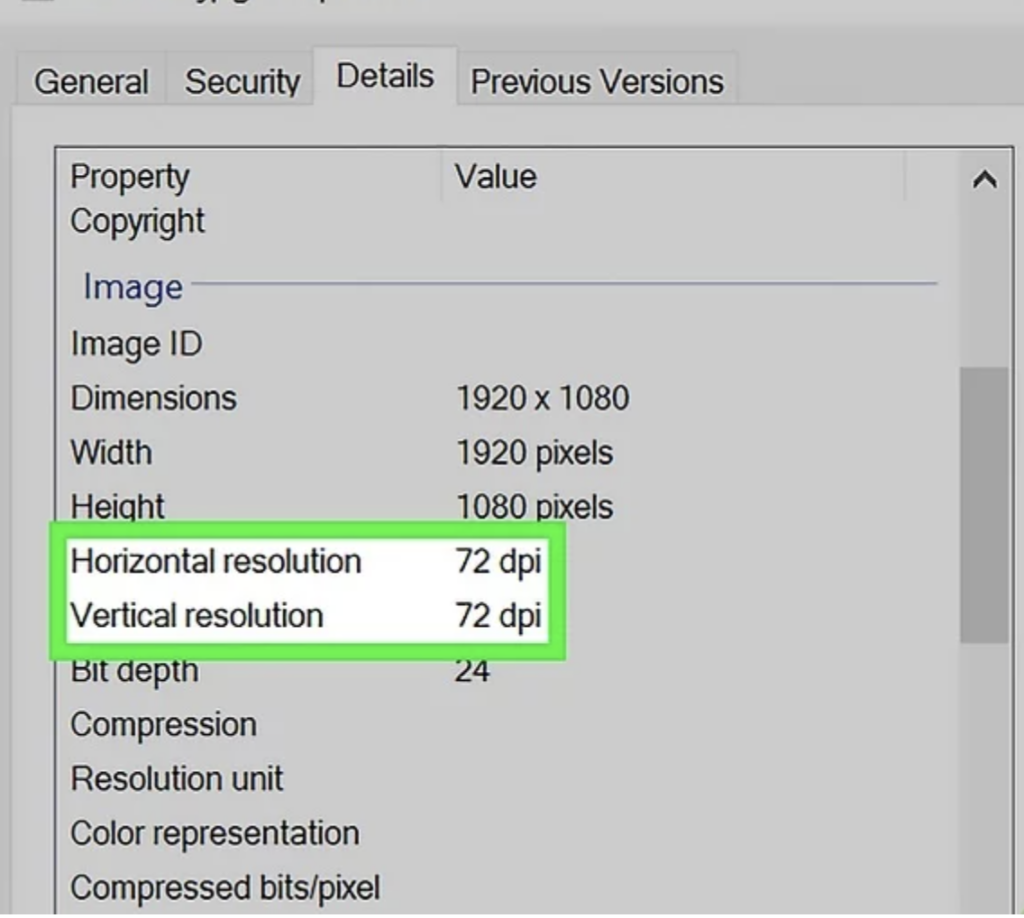
- Click Details. This is the tab at the top, between Security and Previous Versions.
- View the DPI. Scroll down to the Image header. You’ll find the DPI next to Horizontal resolution and Vertical resolution.
The File Explorer (Windows)
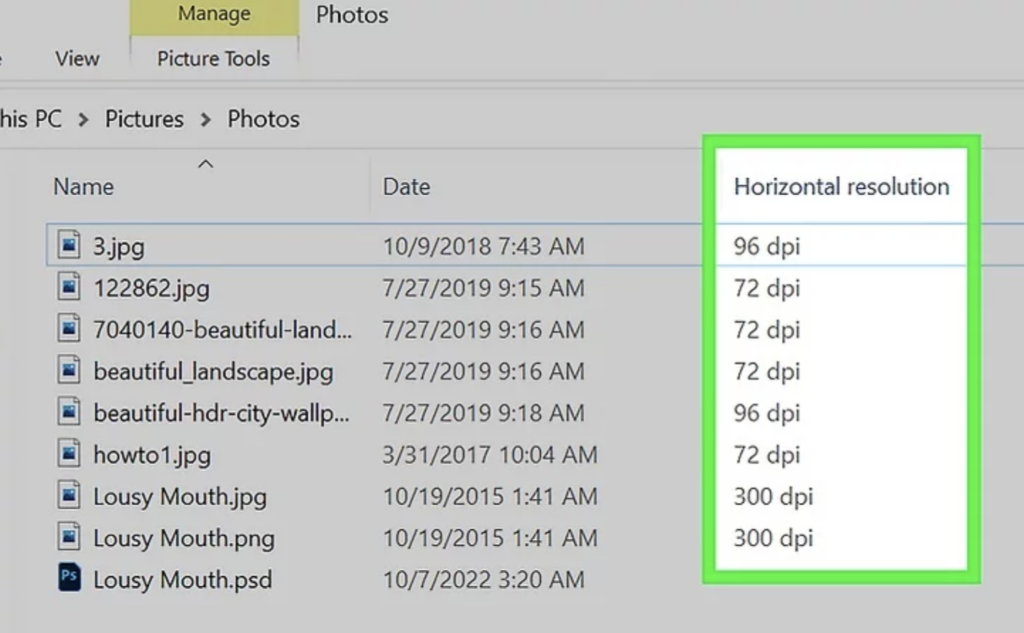
- Open File Explorer and navigate to your image.
- Right-click on the image file and select Properties.
- Click the Details tab at the top bar.
- Scroll down to find image Dimensions and the DPI Resolution.
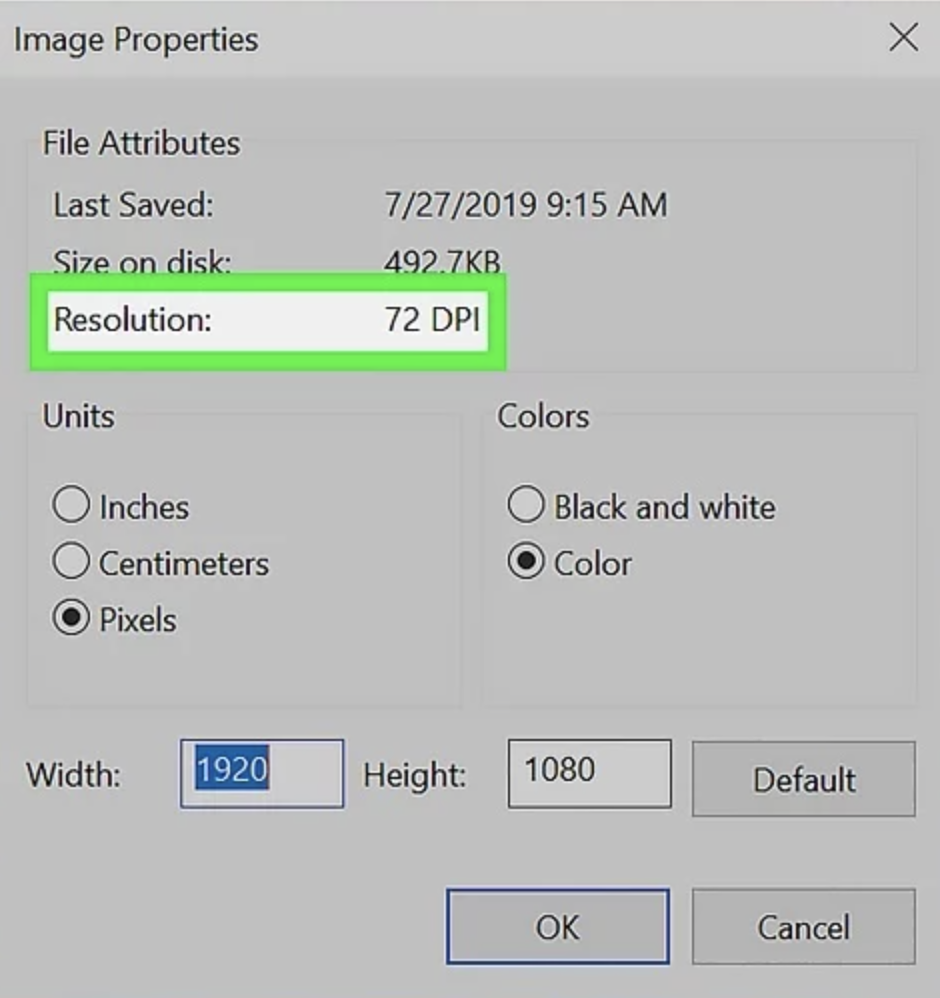
Using Microsoft Paint (Windows)
- Right-click the image file.
- Hover over Open with and click Paint.
- Click File. This will be at the top-left corner.
- Click Properties. You can find this towards the bottom of the menu, next to the checkmark icon.
- Find the DPI. You’ll see the image’s DPI next to Resolution.
What DPI should I Use?
The ‘right’ DPI will vary, depending on your desired result and purpose. When coming to the decision of what DPI to use, consider the following:
- Size. The larger the image that needs to be printed; the higher the ‘dot density’ it will require to look high-quality. Therefore, if you need to print a large image, you’ll need a high DPI to accommodate the size. The more ink dots per inch, the larger you can scale the image without sacrificing quality.
- Viewing distance. How far away the viewer will be standing from the printed image can affect your required resolution. The further away you stand, the less detail you need to see. This applies best to posters and certain art prints.
- Paper, printer and ink. The type of printer and materials used can also affect how crisp an image is when printed.
What Does 300 DPI Mean?
So if DPI means dots per inch, 300 DPI means there will be 300 dots of ink per inch. 300 DPI is the standard benchmark for optimal print quality. It’s considered the minimum resolution required for high-quality printing, especially for images and graphics.
An image with a resolution of 300 DPI or higher will have sharp text, preserved fine details, and will appear vibrant and true to color.
DPI also impacts your print size. Each pixel in a digital image corresponds to a dot in the print. For example, if you have an image that’s 2400 pixels wide and print it at 300 DPI, the printed image will be eight inches wide. If you print the same image at 180 DPI, it will be larger—about 13.3 inches wide.
It’s a matter of simple division: the number of pixels divided by the DPI determines the size of the print.
Understanding DPI helps ensure that your prints come out looking sharp at the right size for your needs.
Is 72 DPI High Resolution?
No, 72 DPI is not considered high resolution, especially for printing. Historically, 72 DPI has been a standard screen resolution used in early computer monitors.
For print-quality images, a resolution of 300 DPI or higher is considered high resolution. Lower DPI values, like 72 DPI, will likely print pixelated or blurry, particularly at larger sizes or when viewed up close.
Counterintuitively, since print requires a higher resolution than many screens and since images in print are often printed larger than they’re represented on your screen, an image that looks good on your screen isn’t guaranteed to look good in print if the resolution is below 300dpi.
Conclusion
In conclusion, determining the DPI of an image is a simple yet essential skill. Understanding DPI not only enhances your ability to create stunning visuals but also enables you to make informed decisions when preparing graphics for both digital and print media!
Struggling to find the DPI of your images? Take advantage of Arvin‘s suite of powerful image tools to enhance your visuals effortlessly!
- Upscale your images for better resolution
- Remove Background for a polished look
- Use our AI Image Generator or AI Logo Designer to create stunning new content!
Don’t wait—elevate your images today! Try Arvin now and explore all our image tools for a seamless creative experience!
FAQs
The best resolution for your project depends on its purpose. For print resolution, 72 DPI is generally considered too low, and may be better suited to small icons that do not need to be high-quality. 300 DPI meanwhile is the printing standard for photos and professional brochures, which need to look crisp and detailed.
The conversion of PPI to DPI is usually 1:1. This means if an image is 10 inches in width by 10 inches in height at 300 DPI, your pixel dimensions need to be 3000px x 3000px. In other words, you need to multiply the print size (width and height in inches) by 300 to find the right pixel dimensions (e.g. 3000px x 3000px) to provide 300 DPI.
For instance a 300 DPI image corresponds to 300 (length) x 300 (height) pixels image, which means 90000 pixels.